The secret to mastering a plunging neckline isn’t the product you use, but the structural engineering you apply.
- Traditional bras fail because they rely on a ‘suspension bridge’ model; extreme low-cuts require an ‘adhesion and cantilever’ approach.
- Success depends on a system of skin preparation, precise tape application, and rigorous movement testing before you leave the house.
Recommendation: Stop searching for a single magic bra and start thinking like a stylist: build your support system with layers of tape, cups, and know-how tailored to your dress and body.
You’ve found it. The dress. The one with the breathtakingly daring, plunging neckline that’s destined for a summer wedding or a glamorous charity gala. The initial thrill, however, is often swiftly followed by a logistical panic: “What on earth do I wear under this?” The standard advice is a frustratingly simple loop of “try a plunge bra” or “just use fashion tape.” But these suggestions barely scratch the surface, ignoring the complex physics of supporting the bust when traditional architecture—the band and straps—is completely removed from the equation.
For too long, the conversation has been about hiding lingerie. But the real artistry lies in understanding foundation architecture. It’s about more than just stick-on cups; it’s about employing principles of adhesion science, pressure distribution, and structural engineering to create invisible support that is not only effective but also endures through hours of dancing and socialising. This isn’t about finding a product; it’s about mastering a technique.
This guide moves past the generic advice. We will deconstruct the challenge, treating your body as a canvas and your lingerie solutions as the sophisticated tools they are. We’ll explore why standard bras are fundamentally wrong for this task, master the art of applying tape for all-night hold, compare the best tools for the UK’s unpredictable humidity, and, most importantly, show you how to stress-test your work so you can step out with unwavering confidence. Get ready to transform your approach from hopeful guesswork to professional execution.
This comprehensive guide will walk you through the essential strategies and professional secrets for achieving flawless support. Below is a summary of the key areas we will cover to ensure your look is as secure as it is stunning.
Summary: The Stylist’s Playbook for Extreme Low-Cut Dresses
- Why does a low-cut dress require a completely different foundation garment?
- How to apply fashion tape so it holds for 6 hours of dancing?
- Silicone Cups vs Boob Tape: Which works better for humidity?
- The adhesive removal mistake that tears the skin
- What 3 movements must you test before leaving the house in a plunge dress?
- Why do suspension straps require precise tensioning to avoid skin indentation?
- Why does the ‘shelf’ effect of a balconette create a rounder shape?
- How to incorporate lingerie elements into formal evening attire without breaking dress codes?
Why does a low-cut dress require a completely different foundation garment?
The fundamental reason a standard bra fails with a plunging neckline is a matter of physics. A traditional bra operates on a ‘suspension bridge’ model. The band provides the majority of the support (around 80%), acting as a firm anchor around the torso, while the straps lift from above. This system requires a central gore (the piece connecting the cups) and a substantial band right where a low-cut dress has, well, nothing. It’s a brilliant piece of engineering that has driven a massive industry, with a report showing the UK bra market generated nearly £1 billion annually. However, its very design is at odds with a deep V-neck.
Extreme low-cut solutions discard this model entirely. They rely on a combination of adhesion and a ‘cantilever’ principle. Instead of lifting from a band below, they anchor directly to the skin on the sides and top of the breast, using tension to lift and shape. Boob tape, for example, is stretched from the base of the breast towards the shoulder, creating an upward pull. Adhesive cups stick directly to the breast, pulling the tissue inwards and upwards. This is a completely different architectural approach.
Therefore, the choice isn’t about finding a “better bra”; it’s about shifting your entire mindset. You are no longer looking for a garment that encircles and lifts. You are now looking for a set of tools that will adhere, mould, and redirect. The deeper the plunge, the more you must rely on the science of adhesion and the strength of the materials themselves, rather than on the familiar structure of a bra. The dress dictates the architecture, and for a plunge, that architecture must be built from the ground up, directly onto the body.
How to apply fashion tape so it holds for 6 hours of dancing?
Ensuring your fashion or boob tape holds through an entire event, especially in the UK where a warm room can quickly become humid, is an art form rooted in preparation and technique. The biggest mistake is simply sticking it on and hoping for the best. The secret to long-lasting hold is creating the perfect canvas and applying structural support. First, the skin must be completely free of any oils, lotions, or even residual soap. The most effective method is to use an alcohol wipe from a first-aid kit or an oil-free cleanser, available at any Boots, to thoroughly clean the area. Always perform a patch test 24 hours before the event to prevent a disastrous allergic reaction.
Once the skin is prepped, you can apply the ‘Anchor and Triangulation’ technique. This is the professional’s secret. Start by applying the first piece of tape (the ‘anchor’) at the base of the breast, without stretching it. Then, for the subsequent pieces, you will create a supportive fan. Stretch the tape from the side of the breast upwards and outwards towards your collarbone or shoulder, creating a triangular lift. Each new strip should slightly overlap the previous one, reinforcing the structure. For larger busts, more strips create a stronger, more distributed hold. This method transforms simple tape into a powerful support system.
This image provides a close-up look at how this triangulation method should appear on the skin, focusing on the texture and placement of the tape for optimal hold.
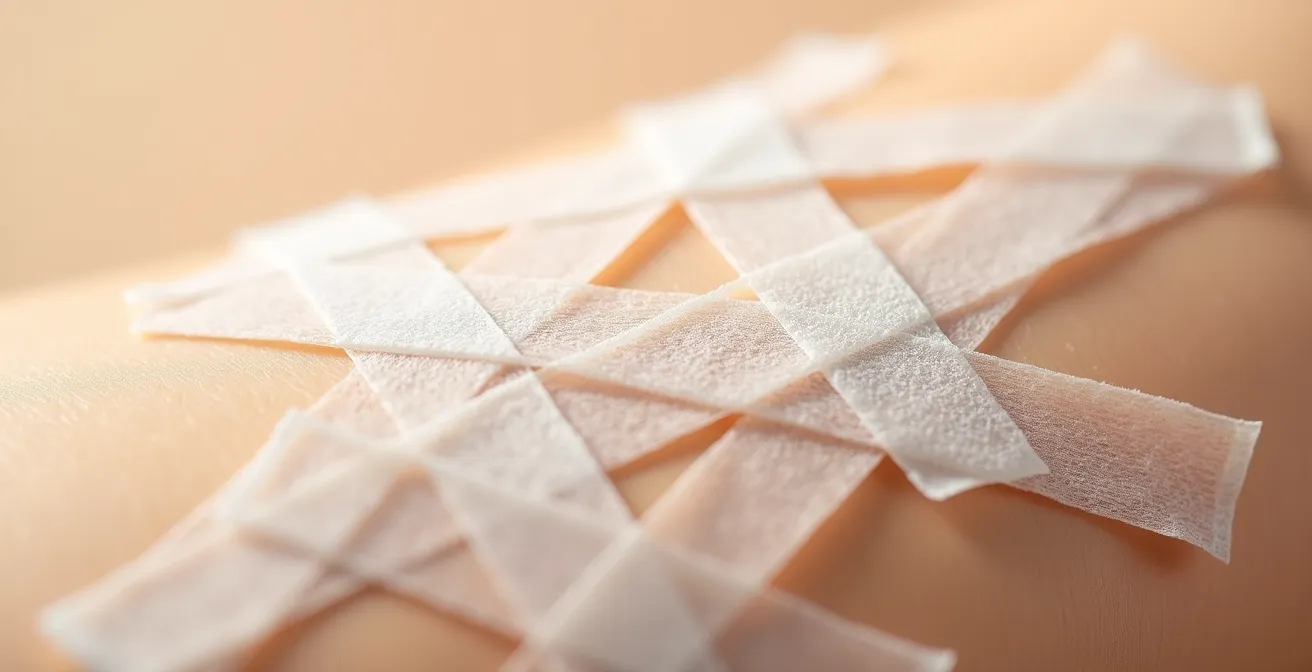
Finally, never apply the tape directly over the nipple. Always use a silicone nipple cover or even a simple cotton pad to protect this sensitive area. As one of the key guidelines from tape specialists Nueboo suggests, the last thing you want is a painful removal process. By preparing the skin and building a triangulated structure, you are not just sticking on tape; you are engineering a custom, internal bra that will remain steadfast through every dance and photo opportunity.
Silicone Cups vs Boob Tape: Which works better for humidity?
The choice between silicone cups and boob tape often comes down to one crucial, often overlooked factor: humidity. An elegant Cotswolds wedding in a cool, slightly damp marquee presents a different challenge from a packed London club in July. Understanding how each solution performs in these conditions is key to avoiding a wardrobe malfunction. In essence, silicone cups offer shape, while boob tape offers structural lift, and their adhesives react very differently to moisture and heat.
Silicone cups are typically lined with a gentle, reusable adhesive. In cool, dry conditions, they provide excellent nipple coverage and a smooth, rounded shape, particularly for smaller to medium busts (A-C cups). However, in humid environments or if you begin to perspire, their weakness is exposed. Moisture builds up underneath the non-breathable silicone, breaking down the adhesive bond and causing them to slide or lose their grip entirely. They are a poor choice for a high-energy dance floor.
Boob tape, on the other hand, is a champion of humid conditions. Made from a cotton-based, breathable fabric with a strong, medical-grade adhesive, it allows some perspiration to escape. While the edges might begin to peel slightly after hours in extreme heat, the central structure generally holds firm. Its key advantage is its customisability. You can create a lift-and-support architecture for any breast size, making it the superior option for larger busts (D+ cups) that require significant lift, regardless of the weather. For maximum security, a hybrid approach—using tape for lift and placing a silicone cup over it for shape and nipple coverage—can offer the best of both worlds.
This comparative analysis, sourced from industry experts, provides a clear breakdown of how these solutions perform under different UK weather scenarios.
| Solution Type | Cotswolds Wedding (Cool Damp) | London Club (Hot Humid) | Best For |
|---|---|---|---|
| Silicone Cups | May slide slowly due to moisture buildup | Loses adhesion quickly in heat | Smaller, firmer breasts (A-C cups) |
| Boob Tape | Maintains hold in cool dampness | Edges may peel but center holds | Larger breasts needing customizable lift (D+ cups) |
| Hybrid (Tape + Cups) | Best overall performance | Moderate performance | Maximum security for all sizes |
As this insight from fashion authority Harper’s Bazaar implicitly confirms, the environment is as important as the garment. Your choice should be a strategic one, based on the event’s location and expected activity level, not just the dress itself.
The adhesive removal mistake that tears the skin
The night was a success, the dress was a triumph, but the ordeal is not over. The single most common and painful mistake made with adhesive products is ripping them off quickly, like a plaster. This is a recipe for disaster, leading to redness, painful welts, and even torn skin. The adhesive on quality boob tape is designed for strength; it bonds with the top layer of your epidermis. Treating the removal process with patience and the right tools is not optional—it is essential for skin health.
The key to safe removal is to dissolve the adhesive *before* you start pulling. The most effective solvent is oil. Douse a cotton pad in a body-safe oil—Johnson’s Baby Oil or simple coconut oil, both easily found at a local supermarket or chemist—and saturate the tape completely. You need to be generous. Let the oil sit and soak for at least 30 seconds, though a few minutes is even better. A warm shower can also work wonders, as the steam helps to loosen the adhesive’s grip naturally.
Once the tape is saturated, the technique is crucial. Do not pull the tape away from your body. Instead, hold your skin down firmly with one hand and gently, slowly, peel the tape back on itself at a 45-degree angle with the other. You are essentially rolling the tape off the skin, rather than pulling the skin up with the tape. If you feel any resistance or pain, stop and apply more oil. After removal, the skin will be sensitive. Immediately apply a soothing, fragrance-free cream like Sudocrem or E45 to calm any irritation. If significant redness persists for more than 24 hours, it’s wise to consult an NHS pharmacist, who may recommend a mild hydrocortisone cream.
What 3 movements must you test before leaving the house in a plunge dress?
You’ve applied your foundation architecture, you feel secure, and the dress looks impeccable in the mirror. But a static pose is not the reality of an event. Before you even think about stepping into a taxi, you must perform a series of dynamic stress tests. These three movements simulate the most common actions at any party and will instantly reveal any weak points in your tape application, saving you from a public wardrobe failure. Think of it as a final quality control check by your own personal stylist.
First is ‘The Grand Entrance Bend’. Stand with your feet together and bend forward at the waist to a 90-degree angle, as if you’ve gracefully dropped your clutch bag. Hold for a moment and then slowly rise. This tests gravity’s direct pull on your adhesive solution. Does anything feel loose? Did you feel a shift? This is the ultimate test for your bottom anchor points and the vertical hold of your tape.
Next, perform ‘The Dance Floor Twist’. Stand up straight and twist your torso sharply from side to side, mimicking a sudden turn or an enthusiastic dance move. This tests the tape’s resistance to shear force and friction against the dress fabric. It ensures your side anchors are secure and that the movement of the dress won’t dislodge the tape.
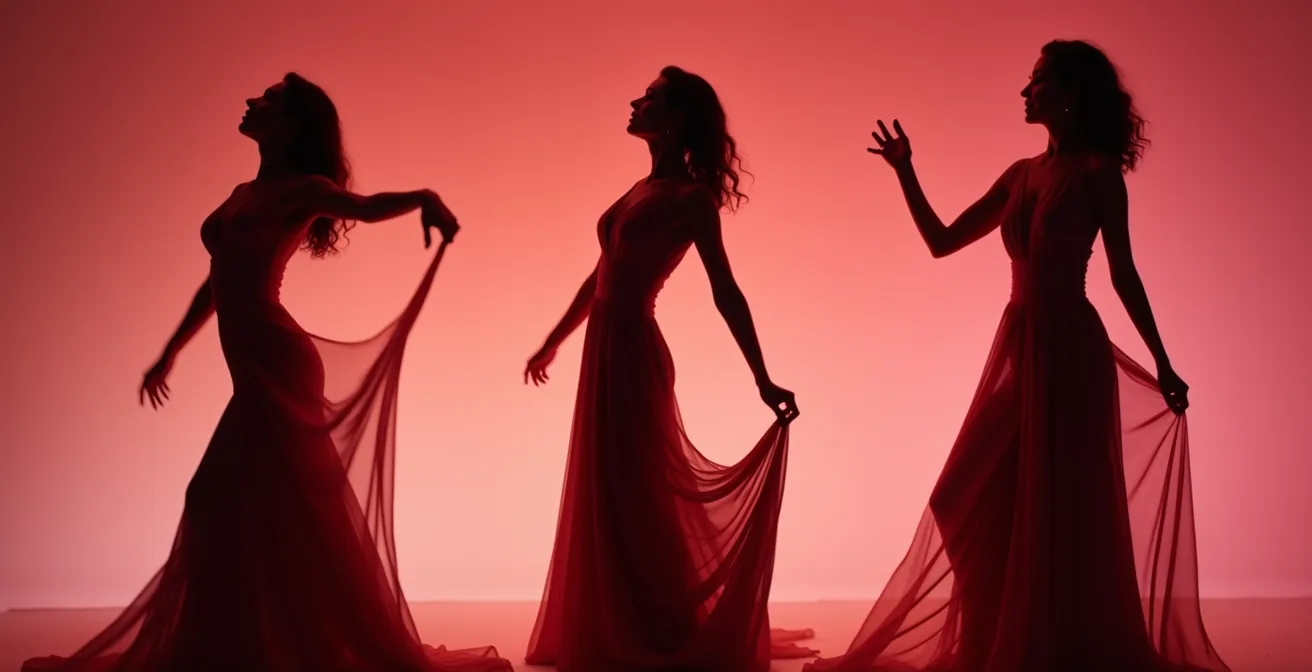
Finally, there’s ‘The Champagne Reach’. Reach both arms straight up overhead, as if you’re hailing a black cab or reaching for a glass from a tall server. This movement tests the security of your entire structure, particularly the upward stretch and anchor points near your shoulders or collarbones. If the tape at the base of your breasts lifts or pulls, it needs reinforcing. These elegant silhouettes demonstrate the range of motion you need to be confident in.
Your Pre-Gala Foundation Garment Audit
- Contact Points Audit: With the dress on, map out every single edge of the neckline, armholes, and back where the fabric meets your skin. These are your ‘no-go’ zones for visible support.
- Toolkit Inventory: Lay out all potential tools: boob tape, fashion tape, silicone nipple covers, and any low-plunge bras. Assess what you have versus what the dress architecture demands.
- Cohesion Test: Apply a small test strip of your chosen tape under the dress fabric. Check in different lighting. Does the texture show through? Do adhesive cups create an unnatural line?
- Confidence Check: Perform the three essential movement tests (Bend, Twist, Reach). Do you feel 100% secure and forget you’re wearing it, or are you subconsciously holding back? The goal is freedom, not fear.
- Integration Lock-In: Once confident, execute your final ‘foundation architecture’. Apply the full solution, put on the dress, and do one last, quick movement check before heading out the door.
Why do suspension straps require precise tensioning to avoid skin indentation?
While many extreme low-cut solutions are strapless, some ultra-low plunge bras or bodysuits use thin, often clear, “suspension straps” for added lift. The effectiveness of these garments hinges on one critical detail: precise tensioning. Unlike a standard bra strap that distributes weight over a wider area, these fine straps concentrate the entire load onto a very small surface of the skin. If they are too tight, they create what stylists call the ‘tote bag handle effect’—digging into the shoulders, causing unsightly red indentations, and turning an elegant look into a painful experience.
The physics are simple: pressure equals force divided by area. A thin strap has a tiny area, so even a small amount of force (the weight of the bust) results in high pressure on the skin. This not only creates marks but can have health implications. Prolonged high pressure can restrict blood flow, leading to bruising, and in severe cases, can even compress superficial nerves, causing numbness or tingling. It’s a classic case of an aesthetic choice potentially becoming a minor medical issue if not managed correctly.
While red marks are common, overly tight straps worn for hours can lead to bruising, broken capillaries, or even nerve compression, turning an aesthetic choice into a minor health issue.
– Brastop Fitting Guide, Brastop Full Bust Party Solutions
This is precisely why professional fitting is so valuable. Trained consultants at specialist UK boutiques like Rigby & Peller or department stores such as Selfridges and John Lewis are experts in pressure distribution. They can adjust these suspension systems to find the perfect equilibrium: enough tension to provide lift without creating harmful pressure points. They ensure the load is balanced correctly, so the straps ‘float’ on the skin rather than digging into it. For any complex foundation garment, seeking this expertise is a worthwhile investment in both comfort and health.
Why does the ‘shelf’ effect of a balconette create a rounder shape?
While not a solution for a deep plunge, understanding the engineering of other bra styles, like the balconette, provides crucial context for how different shapes are created. The balconette is the master of creating a rounded, uplifted silhouette, often described as the ‘shelf’ effect. This isn’t magic; it’s a specific design feature. Unlike a full-cup or plunge bra, a balconette has a shorter, demi-cup with a nearly horizontal top line. Its primary lifting power comes from a vertical seam and the underwire, which act as a platform, pushing the breast tissue vertically upwards from below.
This upward push is what creates the signature ‘shelf’ or ‘cakes on a plate’ look, where the top of the bust is full and rounded. This shape is absolutely ideal for square or wide scoop necklines, where it fills out the upper part of the décolletage beautifully. This style has deep roots in British fashion history, echoing everything from the supportive bodices of the Restoration court to the iconic, deconstructed corsetry of Vivienne Westwood in the 1990s. It’s about creating fullness on top, not cleavage in the centre.
A plunge bra, by contrast, is engineered for the opposite effect. Its cups are angled inwards, and the central gore is very low and narrow. The entire structure is designed to push the breasts together from the sides, creating a deep ‘valley’ or cleavage. Trying to wear a balconette with a V-neck results in the bra being visible, while wearing a plunge bra with a square neck can leave the upper bust looking empty. The lesson here is to match the bra’s engineering to the dress’s neckline. The balconette creates a shelf for square necklines; the plunge creates cleavage for V-necks. They are two different tools for two different jobs.
Key Takeaways
- Mastering a low-cut dress is about structural engineering, not just finding the right product.
- Skin preparation and the ‘Anchor & Triangulation’ taping technique are non-negotiable for all-night hold.
- Always stress-test your foundation with the ‘Bend, Twist, and Reach’ movements before leaving the house.
How to incorporate lingerie elements into formal evening attire without breaking dress codes?
Incorporating lingerie into a formal look is the ultimate power move, but it requires navigating a minefield of dress codes. For high-society UK events like Royal Ascot’s Royal Enclosure, which has stringent rules on strap widths, or a conservative City Black Tie dinner, overt lingerie is a clear faux pas. The art lies in strategic layering and suggestion, rather than outright display. It’s about hinting at the sophisticated architecture beneath without violating the event’s sartorial expectations. This approach reflects the growing confidence in the sector, as a report states the UK lingerie market is projected to grow at 4.6% CAGR.
One of the most elegant methods is to use lingerie-inspired pieces as outerwear. A beautifully constructed corset top from a luxury brand like Agent Provocateur, styled with high-waisted, tailored trousers and a sharp blazer, reads as high fashion, not underwear. Another chic option for a blazer look is to allow a sliver of a lace-trimmed silk camisole to peek out. The key is ensuring that any visible ‘strap’ element (like the edge of the camisole) is substantial enough to meet any formal width requirements.
Case Study: Navigating UK Formal Event Dress Codes
For prestigious events with strict rules, such as Royal Ascot’s Royal Enclosure demanding specific strap widths, or formal City Black Tie functions, creative solutions are paramount. Stylists often recommend using high-end, lace-trimmed silk camisoles that peek from under blazers, ensuring the visible edge meets the width requirements. Another sophisticated tactic involves styling corset tops from brands like Agent Provocateur as outerwear, paired with tailored trousers for a look that is both formal and fashion-forward. The ultimate strategy involves strategic layering, where the formal outer look conceals intricate and sophisticated lingerie elements, designed for a subtle reveal only in more private, post-event settings.
The other approach is the ‘private reveal’. This involves wearing your most exquisite and complex lingerie—perhaps a full basque and stocking set—completely concealed beneath a demure, floor-length gown. The external look is one of perfect conformity to the dress code, but the internal secret provides a powerful sense of personal confidence and glamour. It’s a nod to the idea that the most important person your lingerie should impress is you. By choosing between strategic outerwear styling or the private reveal, you can embrace the beauty of lingerie at any formal event with sophistication and grace.
Now that you are armed with the techniques of a professional stylist, the next step is to confidently apply this knowledge. Begin by assessing your wardrobe and dare to choose the dress that once seemed impossible to wear.